Turntable
The Rotating Device
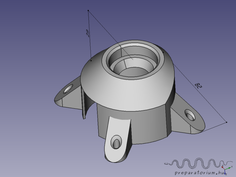
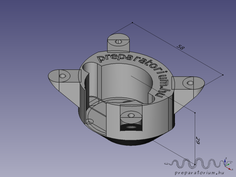
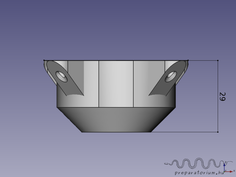
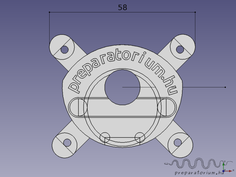
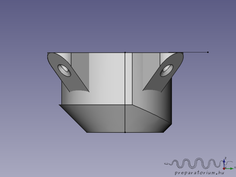
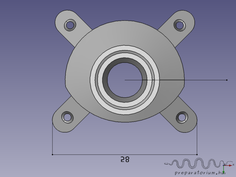
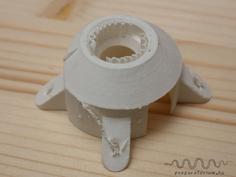
I designed two 3D printable elements to assemble the turntable easily. Download the two files below and print them with a 3D printer.
Click on the thumbnails to open the images in full size.
Note: On the thumbnails below the measurements are in millimeters.
A forgató eszköz
A forgató eszköz egyszerű összeszereléséhez terveztem két, 3D nyomtatóval nyomtatható alkatrészt. Töltsd le az alábbi két filet, majd egy 3D nyomtatással foglalkozó cégnél nyomtasd ki.
Kattints a miniatűrökre nagyobb méretért.
Megjegyzés: Az alábbi képeken a méretek milliméterben vannak.
Element A / A elem
Element B / B elem
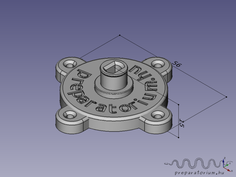
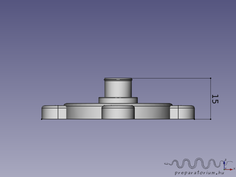
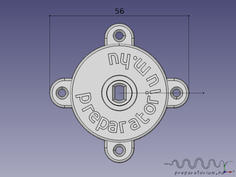
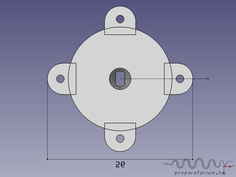
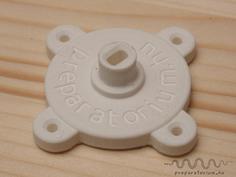
Before assembling the turntable check that the bearing and the stepper motor fit well in element A and if the stepper motor's spinle fits well to element B. If the printing was imprecise, broaden the tight parts carefully with a sharp knife or with sandpaper. In case the printing was imprecise and the stepper motor's spinle slacks on the element B put some insulation stripe to the spinle. This way you can prevent the slack.
A forgató szerkezet összeszerelése előtt ellenőrizd, hogy a csapágy és a motor megfelelően illeszekedik-e az A elembe, illetve a motor tengelye a B elembe. Amennyiben pontatlan volt a nyomtatás, a szükséges részt óvatosan tágítsd egy éles késsel vagy csiszolópapírral. Ha pontatlan volt a B elem nyomtatása, előfordulhat, hogy a motor tengelye kotyog a B elemben. Ragassz néhány szigetelőszalag csíkot a motor tengelyére, így megszüntetheted a kotyogást.
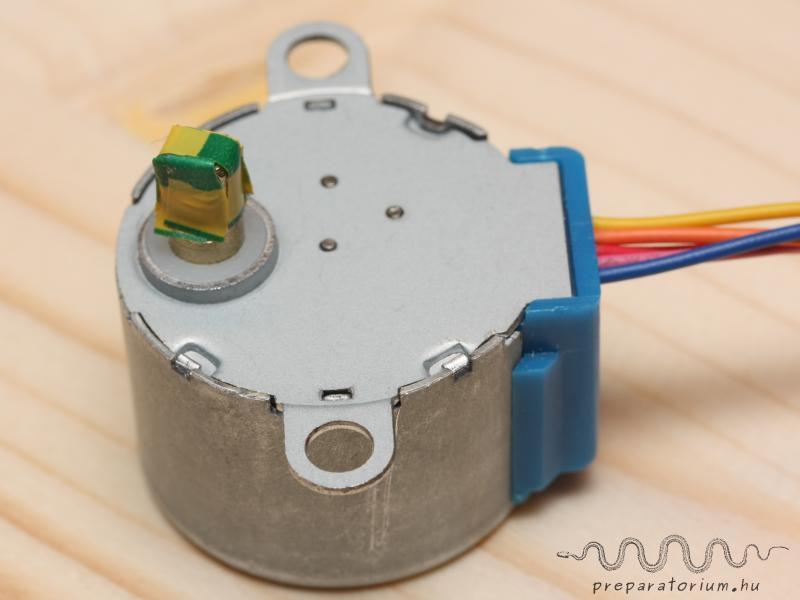
(Use insulation stripe to prevent the slack./
Használj szigszalagot az esetleges kotyogás megszüntetéséhez.)
Screw the element B to a wooden board, and then snap the bearing to it. (Warning: The bearing fits tight to the element B. If you try to dissamble them the element B may break.) Insert the stepper motor to the bottom of element A and then screw the element to an another wooden board. Then push the element A and B together. Now your turntable has just been assembled.
The carrying capacity of the turntable is about 2 kg. If you want to rotate a heavier object, the printed elements may break or the stepper motor can't rotate it.
A B elemet csavarozd fel egy fa táblára, majd pattintsd rá a csapágyat. (Figyelem! A csapágy olyan szorosan illeszkedik a B elemre, hogy annak eltávolítása a B elem sérülésével járhat.) Az A elembe alulról helyezd be a léptető motort, majd csavarozd fel egy másik fa táblára. Ezután pattintsd össze az alsó és felső részt. Ezzel el is készült a forgató szerkezet.
A forgató eszköz maximális terhelhetősége körülbelül 2 kg. Ha ennél nehezebb tárgyat helyezel rá, elképzelhető, hogy eltörik a műanyag alkatrész vagy a léptető motor nem tudja megforgatni a tárgyat.
Note 1: In the video above I screwed the element A to the wooden board from the bottom. This way the turntable is easier to disamble. You can read more about the disassembly in the FAQ.
Note 2: If you don't want to use 3D printed elements, check how I made it previously.
Megjegyzés 1: A videóban az A elemet alulról csavaroztam a fa táblára, hogy könnyebben szétszerelhető legyen. A GyIK-ban olvashatsz bővebben arról, hogy hogyan lehet szétszerelni a forgató szerkezetet.
Megjegyzés 2: Amennyiben nem szeretnél nyomtatott alkatrészeket használni a forgató szerkezethez nézd meg, én hogyan készítettem el korábban.
Installing the Arduino
Before the first usage of the program Product Photo 360 you have to install the script productphoto360_stepper.ino to the Arduino. After downloading the file connect the Arduino and run the $ arduino command in a terminal. Open the file productphoto360_stepper.ino in the graphical interface then upload it to the Arduino. Read more about uploading here.
Note: Windows users can also install the Arduino under Windows (link).
Az Arduino telepítése
A Product Photo 360 program első használata előtt az Arduinora telepíteni kell a productphoto360_stepper.ino scriptet. A file letöltését követően csatlakoztassuk az Arduinot, majd a terminalban az $ arduino paranccsal nyissuk meg a kezelőfelületet. Nyissuk meg a productphoto360_stepper.ino filet, majd töltsük fel az Arduinora. A feltöltésről bővebben itt olvashatsz.
Megjegyzés: Windows felhasználók az Arduino telepítését Windowson is elvégezhetik (link).
Attention! You have to install the Arduino only at the first time or if it is overwritten with an another script.
Figyelem, az Arduino telepítését elegendő egyszer elvégezni, vagy akkor, ha más programmal felülírtad a scriptet!
Next page: Software
Következő oldal: Szoftverek